
I dressed up my plain burlap wreath for Jake’s Vintage Red Scooter Party {I’m still in shock that his party was featured on Hostess with the Mostess AND Kara’s Party Ideas… wahoo!!} I love how this wreath turned out, in fact it’s still on the front door even though Jake’s party was over a month ago. Here I am spending a fun Friday night on a date with Pinterest and I just saw my wreath pinned under July 4th decorating ideas… what a great idea! I’m just going to switch up the “welcome” and put “Happy 4th” and I get to leave it up!

Here’s the original post with a tutorial on how to make your own burlap wreath {I just pinned on the red and blue ribbon later and used stamps and cardstock strung on jute for the mini pennant across it}…
I’ve had my eye on gorgeous burlap wreaths for weeks now and now I have one too! Here’s how I made mine…
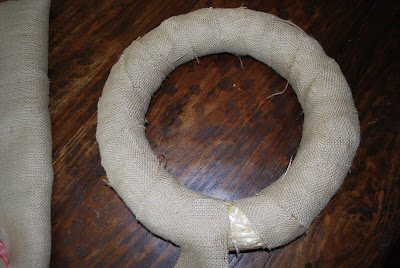
I used a 12 inch straw wreath. I wasn’t sure if I would use the green floral kind or straw until I saw the prices. Green one was $7.99, straw one was $2.49. So, cut some loooooong pieces of burlap {a yard long or so} and it doesn’t matter if they’re pretty, straight pieces. Then grab your straw wreath {with the plastic ON}, some sewing pins and start wrapping the burlap tightly around the wreath. Pin as needed to make it nice and tight.
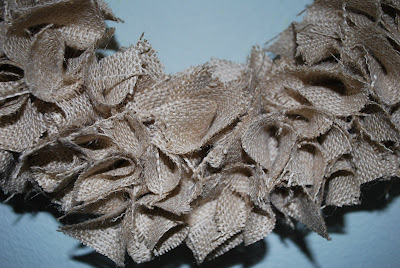
Once you have strips of burlap tightly pinned on all the way around the wreath, cut squares of burlap. Lots and lots of little squares {about 2 x2 inches or so}… and again they do NOT have to be perfect. Wow, this is my kind of project!
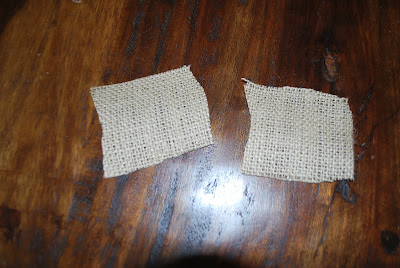
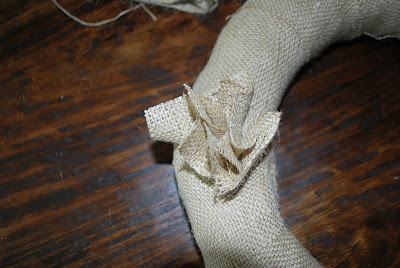
I had no idea how many squares I’d need so I cut about 30 or so at a time, pinned them on, then stopped to cut more squares as I went so I wouldn’t waste any burlap. So, just cut a little pile of squares to get you going, grab one and twist it in the center a little like this:

Then start pinning! I used one sewing pin per square and just started filling in the wreath.
And then just keep going and going…
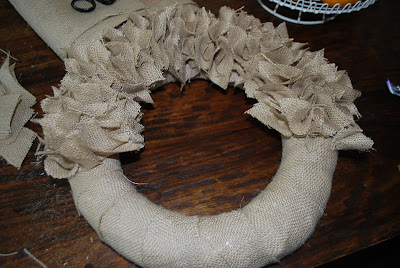
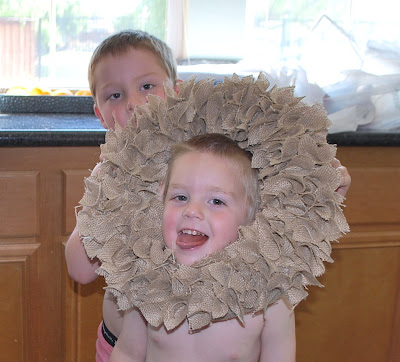
Once you’re about halfway, it’s time to stop and take pictures of your adorable kids running around in their underwear…

Now back to this burlap beauty… and before you know it, you’ll be done!
When it’s done, boys say, “Wow, that’s cool Mom! Looks like a lion…”
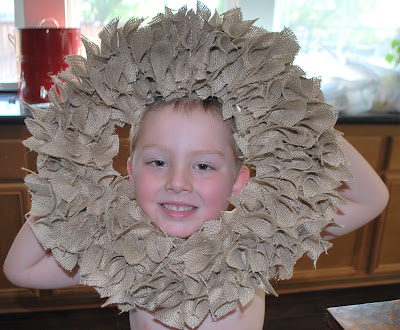
So they’ll take turn wearing the new “lion” wreath…
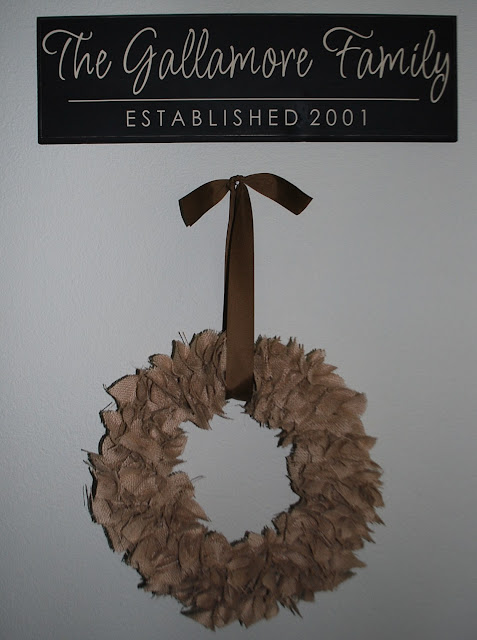
Then tie a big pretty ribbon on it {I used brown grosgrain because I wanted a blank “slate”… I’ll be dressing it up in red and blue for Jake’s birthday soon!}
Then just hang, admire, and love your burlap wreath! And the fact that it only took about 45 minutes tops… and that included the times I stopped to attend to my three little “lions” hanging around!

Summer Safari at The Elephant’s Trunk